Svanik Sharma's Website
Why convolutions are effective
January 14, 2024
Convolutional neural networks have seen great success in computer vision tasks. However, why is this architecture so effective? This article hopes to elucidate the apparent efficacy of convolutional networks in many computer vision tasks. We'll approach this by training a convolutional network on the Fashion MNIST dataset. (Link to notebook).
A brief look at the dataset
First, we make some necessary imports:
import torch
import torch.nn as nn
import torch.nn.functional as F
from torch.utils.data import DataLoader
import torchvision
from torchvision.transforms import ToTensor
import matplotlib.pyplot as plt
import numpy as np
from torchinfo import summary

device_name = None
if torch.cuda.is_available():
    device_name = 'cuda'
else:
    device_name = 'cpu'
device = torch.device(device_name)
print('Using device: ' + device_name)
Then, we load the dataset and display it:
# this will download the dataset to a local directory if not downloaded already
# otherwise looks for a directory named "fashion_mnist"
train_dataset = torchvision.datasets.FashionMNIST(root='fashion_mnist', download=True, train=True, transform=ToTensor())
test_dataset = torchvision.datasets.FashionMNIST(root='fashion_mnist', download=True, train=False, transform=ToTensor())
labels = [
    'T-shirt/top',
    'Trouser',
    'Pullover',
    'Dress',
    'Coat',
    'Sandal',
    'Shirt',
    'Sneaker',
    'Bag',
    'Ankle Boot'
]
figure = plt.figure(figsize=(5, 5))
rows, cols = 3, 3
for i in range(1, cols * rows + 1):
    sample_idx = torch.randint(len(train_dataset), size=(1,)).item()
    img, label = train_dataset[sample_idx]
    figure.add_subplot(rows, cols, i)
    plt.title(labels[label])
    plt.axis("off")
    plt.imshow(img.squeeze(), cmap="gray")
plt.show()
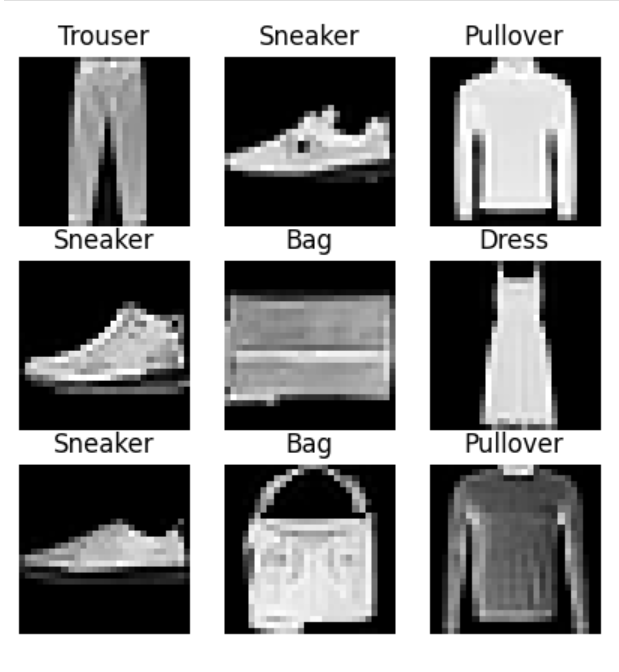
The FashionMNIST dataset has 10 classes (indicated in the labels array above) and they each consist of
sample_idx = torch.randint(len(train_dataset), size=(1,)).item()
img, _ = train_dataset[sample_idx]
print(f'Image shape: {img.shape}')
max_pixel_val = torch.max(img)
min_pixel_val = torch.min(img)
print(f'Range of image pixels: {min_pixel_val} to {max_pixel_val}')
What are convolutions?
The convolution operation is defined as below:
where \newline(I\newline) is an image and \newline(K\newline) is called the kernel. The above equation gives the computation for the
Creating a convolutional neural network
Basic implementation
We implement a custom convolution layer. Note that the layer we are creating is not trainable (which I've done to make the implementation of convolution a bit easier to understand), but it doesn't take too much effort to make the DIYConv2D layer usable.
In addition to the this convolution layer, I've also created a test_conv_impl to compare our convolutional layer with the one created by Pytorch. The code below implements the convolution (cross-correlation) operation that we discussed above:
class DIYConv2D(nn.Module):
    def __init__(self, in_channels, out_channels, kernel_size, padding='valid', stride=1):
        # TODO: implement padding and stride
        super().__init__()
        self.out_channels = out_channels
        self.in_channels = in_channels
        self.kernel_size = kernel_size
        self.kernel = torch.rand(out_channels, in_channels, kernel_size, kernel_size)
        self.bias = torch.rand(out_channels,)

    # For testing
    def _set_parameters(self, kernel, bias):
        self.kernel = kernel
        self.bias = bias
        assert self.kernel.shape == (self.out_channels, self.in_channels, self.kernel_size, self.kernel_size)
        assert self.bias.shape == (self.out_channels,)

    def forward(self, x):
        height = x.shape[1] - self.kernel_size + 1
        width = x.shape[2] - self.kernel_size + 1
        conv = torch.zeros((self.out_channels, height, width))
        for i in range(self.out_channels):
            for j in range(height):
                for k in range(width):
                    conv[i][j][k] = torch.sum(self.kernel[i, ...] * x[..., j:j+self.kernel_size, k:k+self.kernel_size])
        return conv + self.bias.reshape(self.out_channels, 1, 1)

def test_conv_impl(img_width, img_height, kernel_size, padding=0, stride=1):
    img = torch.rand(1, img_width, img_height)
    conv_layer = nn.Conv2d(kernel_size=kernel_size, in_channels=1, out_channels=3, stride=stride, padding=padding, dilation=1, bias=True)
    diy_conv_layer = DIYConv2D(1, 3, kernel_size=kernel_size, padding=padding, stride=stride)
    diy_conv_layer._set_parameters(conv_layer.weight, conv_layer.bias)
    conv_layer_output = conv_layer(img)
    diy_conv_layer_output = diy_conv_layer(img)
    print(conv_layer_output)
    print(diy_conv_layer_output)
    assert torch.allclose(conv_layer_output, diy_conv_layer_output, atol=1e-5, rtol=1e-5)

test_conv_impl(3, 3, 2)
test_conv_impl(28, 28, 3)
test_conv_impl(32, 64, 8)
Padding
One problem with the convolution operation is that pixels near the edge of the image are not convolved. We can solve this problem by adding padding to the image. Another reason to use padding is to ensure that the dimensions of the feature map match the dimensions of the input. Consider the following
And say we apply one layer of padding. Then, the image becomes:
If we were to now apply a
Note: Adding padding to images for even-sized kernels is not necessarily well-defined. It seems that Pytorch will do this by adding padding to the right and bottom of the matrix as described here. Generally for computer vision tasks, we use odd-sized kernels so that the padding is symmetric on all sides and there is a well-defined central pixel (see the textbook by Bishop in the References below for more details).
class DIYConv2D(nn.Module):
    def __init__(self, in_channels, out_channels, kernel_size, padding='valid', stride=1):
        super().__init__()
        self.out_channels = out_channels
        self.in_channels = in_channels
        self.kernel_size = kernel_size
        self.kernel = torch.rand(out_channels, in_channels, kernel_size, kernel_size)
        self.bias = torch.rand(out_channels,)
        self.padding = padding

    # For testing
    def _set_parameters(self, kernel, bias):
        self.kernel = kernel
        self.bias = bias
        assert self.kernel.shape == (self.out_channels, self.in_channels, self.kernel_size, self.kernel_size)
        assert self.bias.shape == (self.out_channels,)

    def _add_padding(self, x):
        padding = None
        if self.padding == 'valid':
            padding = 0
        elif self.padding == 'same':
            padding = (self.kernel_size - 1) // 2
        elif isinstance(self.padding, int):
            padding = self.padding
        else:
            raise Exception(f'Undefined padding mode \"{self.padding}\"')
        padded_x = x
        for _ in range(padding):
            padding_vertical = torch.zeros((padded_x.shape[0], padded_x.shape[1] + 2, 1))
            padding_horizontal = torch.zeros((padded_x.shape[0], 1, padded_x.shape[2]))
            padded_x = torch.cat((padding_horizontal, padded_x, padding_horizontal), dim=1)
            padded_x = torch.cat((padding_vertical, padded_x, padding_vertical), dim=2)
        return padded_x

    def forward(self, x):
        x = self._add_padding(x)
        height = x.shape[1] - self.kernel_size + 1
        width = x.shape[2] - self.kernel_size + 1
        conv = torch.zeros((self.out_channels, height, width))
        for i in range(self.out_channels):
            for j in range(height):
                for k in range(width):
                    conv[i][j][k] = torch.sum(self.kernel[i, ...] * x[..., j:j+self.kernel_size, k:k+self.kernel_size])
        return conv + self.bias.reshape(self.out_channels, 1, 1)

test_conv_impl(3, 3, 3, padding='valid')
test_conv_impl(3, 3, 3, padding='same')
test_conv_impl(3, 3, 1, padding=2)
test_conv_impl(28, 28, 5, padding='valid')
test_conv_impl(28, 28, 5, padding='same')
test_conv_impl(28, 28, 5, padding=2)
test_conv_impl(32, 64, 7, padding='valid')
test_conv_impl(32, 64, 7, padding='same')
test_conv_impl(32, 64, 7, padding=10)
Stride
Sometimes, instead of padding, we wish to make the feature map smaller than the input rather than keep it of a similar size. We can do this by using a different stride when applying the kernel. Essentially, instead of moving the sliding window over by
class DIYConv2D(nn.Module):
    def __init__(self, in_channels, out_channels, kernel_size, padding='valid', stride=1):
        super().__init__()
        self.out_channels = out_channels
        self.in_channels = in_channels
        self.kernel_size = kernel_size
        self.kernel = torch.rand(out_channels, in_channels, kernel_size, kernel_size)
        self.bias = torch.rand(out_channels)
        self.padding = padding
        self.stride = stride

    # For testing
    def _set_parameters(self, kernel, bias):
        self.kernel = kernel
        self.bias = bias
        assert self.kernel.shape == (self.out_channels, self.in_channels, self.kernel_size, self.kernel_size)
        assert self.bias.shape == (self.out_channels,)

    def _add_padding(self, x):
        padding = None
        if self.padding == 'valid':
            padding = 0
        elif self.padding == 'same':
            padding = (self.kernel_size - 1) // 2
        elif isinstance(self.padding, int):
            padding = self.padding
        else:
            raise Exception(f'Undefined padding mode \"{self.padding}\"')
        padded_x = x
        for _ in range(padding):
            padding_vertical = torch.zeros((padded_x.shape[0], padded_x.shape[1] + 2, 1))
            padding_horizontal = torch.zeros((padded_x.shape[0], 1, padded_x.shape[2]))
            padded_x = torch.cat((padding_horizontal, padded_x, padding_horizontal), dim=1)
            padded_x = torch.cat((padding_vertical, padded_x, padding_vertical), dim=2)
        return padded_x

    def forward(self, x):
        x = self._add_padding(x)
        height = int(np.floor(1 + (x.shape[1] - self.kernel_size) / self.stride))
        width = int(np.floor(1 + (x.shape[2] - self.kernel_size) / self.stride))
        conv = torch.zeros((self.out_channels, height, width))
        jc, kc = 0, 0
        for i in range(self.out_channels):
            jc = 0
            for j in range(0, x.shape[1] - self.kernel_size + 1, self.stride):
                kc = 0
                for k in range(0, x.shape[2] - self.kernel_size + 1, self.stride):
                    conv[i][jc][kc] = torch.sum(self.kernel[i, ...] * x[..., j:j+self.kernel_size, k:k+self.kernel_size])
                    kc += 1
                jc += 1
        return conv + self.bias.reshape(self.out_channels, 1, 1)

test_conv_impl(3, 3, 3, padding='valid')
test_conv_impl(3, 3, 3, padding='same')
test_conv_impl(3, 3, 1, padding=2)
test_conv_impl(28, 28, 5, padding='valid', stride=2)
test_conv_impl(28, 28, 5, padding='same')
test_conv_impl(28, 28, 5, padding=2, stride=3)
test_conv_impl(32, 64, 7, padding='valid', stride=2)
test_conv_impl(32, 64, 7, padding='same')
test_conv_impl(32, 64, 7, padding=10, stride=4)
Pooling
This next aspect is separate from the convolution operation we have been writing. Pooling is essentially the convolution operation except instead of multiplying and summing with a kernel, we apply some other function. The two most common types of pooling are average pooling and max pooling. To illustrate what pooling is, we perform a
The pooling operation is still like a sliding window, so we look at the first
and we take the maximum of all these elements, which is
which is
If we were to use average pooling, we would take the average of each window and use that as the entries to get the following matrix:
The primary use of the pooling operation is to allow for invariance. For example, in the case of the FashionMNIST dataset, we would like our neural network to be invariant to translations and rotations of the images, i.e, it should be able to tell that a T-shirt is a T-shirt regardless of whether the image is upside-down or rightside-up.
Training and Evaluation
Now all that's left to do is train the network. The network below is a modified version of the LeNet5 network implemented in this Pytorch tutorial. It embodies many of the principles that we discussed above for a convolutional network. It uses max-pooling to be invariant to transformations and increases the number of filters to magnify the receptive field of earlier layers. The convolution-ReLU-maxpool trend is typical for most convolutional neural networks.
class FashionClassifier(nn.Module):
    def __init__(self):
        super().__init__()
        self.conv1 = nn.Conv2d(1, 6, 5)
        self.pool = nn.MaxPool2d(2, 2)
        self.conv2 = nn.Conv2d(6, 16, 5)
        self.fc1 = nn.Linear(16 * 4 * 4, 120)
        self.fc2 = nn.Linear(120, 84)
        self.fc3 = nn.Linear(84, 10)

    def forward(self, x):
        x = self.pool(F.relu(self.conv1(x)))
        x = self.pool(F.relu(self.conv2(x)))
        x = x.view(-1, 16 * 4 * 4)
        x = F.relu(self.fc1(x))
        x = F.relu(self.fc2(x))
        x = self.fc3(x)
        return x
batch_size = 32
classifier = FashionClassifier()
classifier.train(True)
summary(classifier, input_size=(batch_size, 1, 28, 28))
Since this is an image classification task, we use cross-entropy loss:
loss_fn = nn.CrossEntropyLoss()
optimizer = torch.optim.SGD(classifier.parameters(), lr=0.001, momentum=0.9)
epochs = 10
for epoch in range(epochs):
    print(f'Epoch {epoch+1}:')
    total_epoch_loss = 0
    i = 0
    for input, target in DataLoader(train_dataset, batch_size=batch_size, shuffle=True):
        x = input.cuda()
        y = target.cuda()
        optimizer.zero_grad()
        yhat = classifier(x)
        loss = loss_fn(yhat, y)
        loss.backward()
        optimizer.step()
        total_epoch_loss += loss.item()
        # 1875 / 375 = 5, so 5 reports per epoch
        if i % 375 == 374:
            print(f' batch {i+1} loss: {total_epoch_loss / 1000}')
            total_epoch_loss = 0
        i += 1
accuracy = 0.
with torch.no_grad():
    for i, data in enumerate(test_dataset):
        x, y = data
        yhat = classifier(x.cuda())
        accuracy += torch.argmax(yhat) == y
accuracy / len(test_dataset)
If you run this in the notebook, then you should get roughly 85% accuracy on the dataset, which is not bad for a small network. Though this article explored convolutions for a simple image classification task, the convolution operation can be used for object detection, face recognition, and non-computer-vision tasks, such as audio/speech processing (in this case, the convolution would be one dimensional). Either way, the main reason to use convolutions in a network boils down to 1) parameter sharing, 2) sparse connections, and 3) for inference on images of different sizes without retraining.